No-Drill Cable Management for a Small Desk: A Planning Guide
Plan tidy, reversible cable routing for a small desk without drilling: map your cords, keep leg space clear and avoid unsafe power setups.
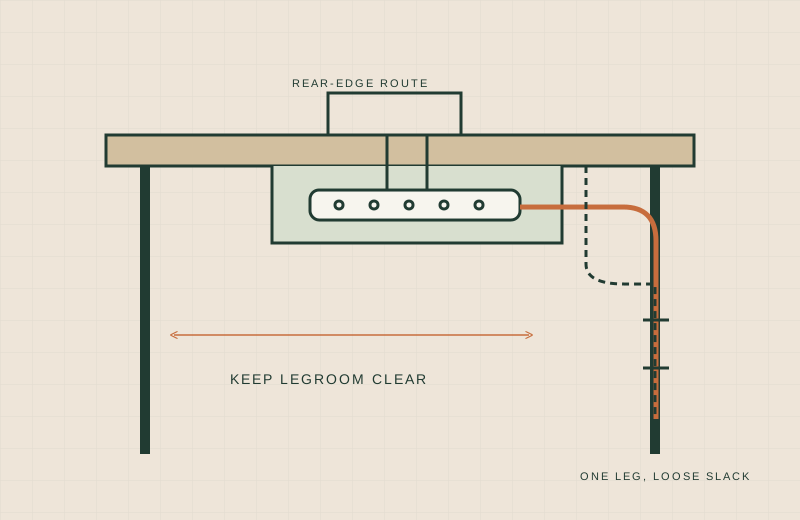
This is a research-based guide, not a hands-on product test. It draws on published workstation guidance and sticks to general planning. It names no products and gives no electrical installation instructions.
Cable tidiness on a small desk is less about looks and more about space. Loose cords eat surface area, tangle around monitor arms and crowd the leg space you need for changing posture.
Why it matters for a small desk
OSHA’s desk guidance says the area under the work surface should stay free of clutter so your legs and feet can move, and that you should limit what is stored there. It also lists keeping frequently used items, like the mouse and keyboard, within easy reach. Cords that dangle into leg space, or pull on a device, work against both.
Plan before you route
- List every cable. Power, display, USB, audio, charging. Note which ones are actually needed daily.
- Cut the count. A dock or a wireless peripheral may remove cords, but only add one if it fits what you already own, and check its documentation.
- Find the power point. Measure from the desk to the outlet. Decide where the strip or adapter will sit, off the floor traffic path and away from liquids.
- Draw the route. Sketch where each cable runs along the rear edge, down a leg or along the underside.
- Leave slack for movement. If a monitor arm or sit-stand desk moves, cables need a loose loop through the full range.
Reversible, no-drill approaches
Think in terms of what is held, not what is cut: adhesive-backed clips, hook-and-loop ties, cable sleeves for data and display lines, and a tray or basket that rests on or clamps to the desk. Each has limits. Adhesives depend on the surface, and a clamped tray depends on the desk construction, so the manufacturer’s instructions for the exact item decide, especially on glass, hollow-core or thin tops. Test adhesives on a hidden spot before committing.
Safety boundaries
- Do not bundle or coil a power cable tightly while it is in use if the cable’s own instructions say not to.
- Do not cover a power strip, adapter or charger in a way that traps heat.
- Do not run cords under rugs or across walkways.
- Do not alter, splice or open any plug, cord or power supply.
- Do not daisy-chain power strips. Follow the strip’s printed rating and manufacturer instructions.
- Keep cords away from desk edges and wheels where they can be pinched or pulled.
If you are unsure about an outlet, a circuit or a damaged cord, stop and ask a qualified electrician or replace the item.
Checklist
- Every cable listed and labeled at both ends
- Daily versus occasional cords separated
- Power strip location chosen, with ventilation and no liquids nearby
- Route sketched along the rear edge and one leg
- Slack loop planned for moving arms, risers or adjustable desks
- Leg and foot space left free, as OSHA advises
- Adhesive tested on a hidden spot
- Surface material checked before using any clamp or adhesive
What not to buy
- Large cable trays before you know your desk’s thickness and underside. A tray that hits a rail or drawer is a return.
- Stronger adhesive as a fix for a weak surface. If the surface is the problem, change the plan.
- A power strip or adapter chosen on looks. Check the ratings against what you plug in.
When to defer
Wait until the monitor and desk layout are settled. Moving an arm or riser later will undo your routing. See How to Measure a Small Desk, Monitor Arm vs Riser and Monitor Arm Wall Clearance first.
Sources
- OSHA eTools: Computer Workstations, Desks
- OSHA eTools: Computer Workstations, Monitors
- Ergotron: Desk Mounts category (manufacturer product category; check the specific model page and installation guide)